FAQS
10 Tips for Choosing the Best Drill Accessories?
Choosing the right Drill Accessories can change a frustrating project into a controlled, accurate job. A worn bit may create heat, rough holes, and wasted material. A suitable accessory can improve cutting speed, surface quality, and user confidence. The difference often appears in small details, such as a clean pilot point or a secure chuck connection.
Roy Berendsohn, a longtime tool editor and practical workshop authority, offers a useful reminder: “Choose the right tool for the job.” This principle applies directly to Drill Accessories. A masonry bit belongs on brick or concrete. A brad-point bit is better suited to clean holes in timber. Metal requires sharper geometry, proper speed, and sometimes cutting fluid. These choices are not merely technical preferences. They affect safety, durability, and the final result.
The following ten tips examine those decisions from a practical angle. They consider material compatibility, size accuracy, shank design, coating quality, storage, and realistic workload. A professional may need premium accessories for daily use. A homeowner might value versatility more than extreme service life. Neither choice is automatically correct.
There is no perfect kit.
Even experienced users make mistakes. I have seen a seemingly minor mismatch damage a bit within seconds. That lesson is easy to remember: compare the accessory with the drill, the material, and the task before pressing the trigger. These guidelines aim to make that check faster, clearer, and more reliable.
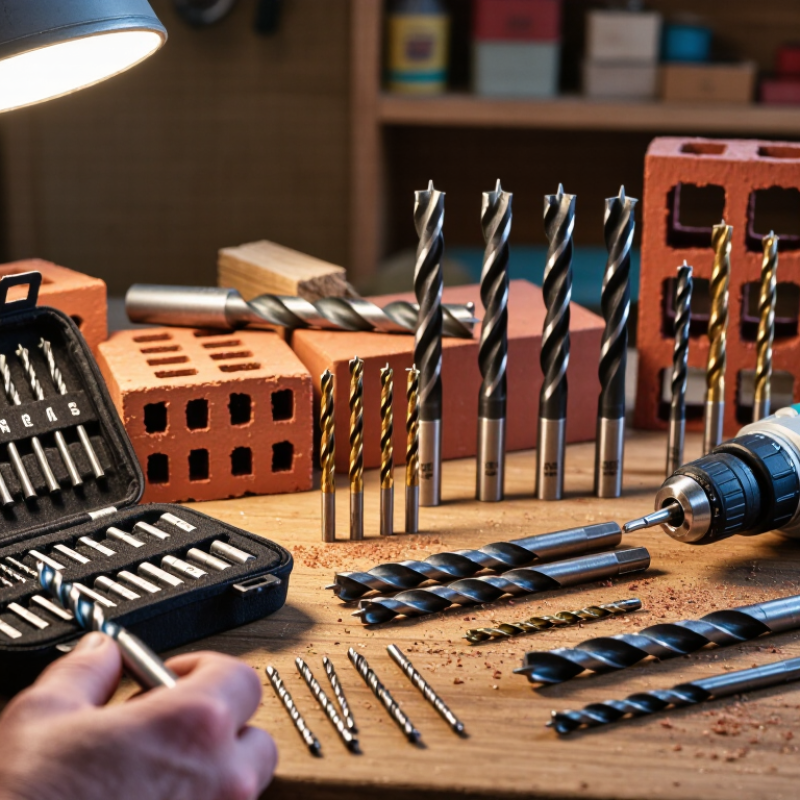
Understanding Drill Accessory Types and Their Primary Uses
Choosing drill accessories starts with the material, not the drill. Twist bits suit wood, plastic, and metal. Masonry bits use carbide tips for brick and concrete. Spade bits make fast holes in timber, while hole saws create wider openings for pipes and cables. Driver bits handle screws, and sanding drums shape edges or remove surface residue.
Tip 1: Match the bit to the surface. A metal bit can overheat in concrete. A masonry bit may leave wood fibers torn.
Tip 2: Check the shank size and chuck compatibility before buying. According to Grand View Research’s 2024 power tools market report, the global market was estimated at about 40 billion dollars in 2023. That scale reflects broad demand, but it does not prove every accessory suits every task. Selection still depends on speed, pressure, and material.
Tip 3: Inspect the cutting edge. A sharp tip should enter cleanly, without excessive force.
Tip 4: Use a pilot hole for large diameters. This reduces wandering and improves control. Safety data from the U.S. Bureau of Labor Statistics continues to identify hand and power tools among common sources of workplace injuries, so eye protection and stable workpieces remain practical requirements. I still keep one slightly worn bit for rough jobs, although that habit is not ideal. It can hide cracks. Replace accessories when cutting becomes slow, heat rises, or the tip shows visible damage.
Matching Accessories to Drill Compatibility and Material Requirements
Choose drill accessories by compatibility before price. Check the chuck capacity, shank shape, torque rating, and maximum speed. A 10 mm bit cannot safely enter every 10 mm chuck. Match the accessory diameter with the drill’s published range.
For hammer drilling, use impact-rated masonry accessories. For ordinary rotary drilling, select accessories designed for non-impact use. The difference matters.
Material changes the decision. High-speed steel suits mild steel, while carbide-tipped tools handle masonry and abrasive surfaces. Wood needs sharp cutting edges and suitable flutes.
For stainless steel, reduce speed, apply cutting fluid, and avoid stopping inside the hole. A practical workshop check is simple: test one hole in scrap material first. It saves time. Maybe.
Use ten checks: shank fit, diameter, length, speed, torque, impact mode, material rating, coating, cooling method, and wear condition.
A 2023 U.S. Bureau of Labor Statistics report recorded 2,607,900 nonfatal workplace injuries in private industry. That figure supports a careful selection process, especially when accessories can bind or eject debris. Eye protection, firm clamping, and controlled pressure remain essential.
Industry testing reports often compare tool life under fixed speed, feed, and material conditions. Those results are useful, but workshop conditions vary. Dust, heat, and operator pressure can reduce performance sharply.
Inspect cutting edges for chipping, discoloration, or uneven wear. Recheck the accessory after the first few holes.
I sometimes choose a longer bit for reach, then regret the extra flex. Shorter is often steadier.
Evaluating Size, Shape, and Performance Specifications
10 Tips for Choosing the Best Drill Accessories
Evaluating Size, Shape, and Performance Specifications
Size is not a minor detail. A bit that matches the chuck diameter reduces wobble and improves control. Check the shank style, working length, and cutting diameter before purchase. In a workshop, a 6 mm bit may suit thin sheet metal, while a longer version can flex noticeably. I have found that extra length often looks useful, but it can reduce accuracy.
Shape should match the material and task. Split-point tips help prevent walking on metal. Brad-point designs keep timber holes cleaner. For masonry, carbide geometry matters more than appearance. The U.S. Department of Energy reports that motor-driven equipment can represent more than half of industrial electricity use, so inefficient drilling deserves attention. A sharp accessory needs less pressure and may reduce heat, noise, and battery drain.
Performance specifications reveal what marketing language hides. Compare maximum speed, impact suitability, temperature resistance, and expected service life. ISO 28927 testing methods show why vibration data should be reviewed under consistent conditions. Look for figures in m/s², not vague claims such as “low vibration.” One weakness remains: published tests rarely copy your exact material or hand pressure. Test a sample first. After several jobs, record wear, hole quality, and overheating. That small log can expose a poor choice faster than a glossy catalogue.
10 Tips for Choosing the Best Drill Accessories? - Evaluating Size, Shape, and Performance Specifications
| No. | Accessory Category | Primary Application | Size and Compatibility | Shape or Design Feature | Performance Specifications to Check | Selection Tip |
|---|---|---|---|---|---|---|
| 1 | Twist Drill Bits | General-purpose drilling in wood, plastic, and mild metal. | Common diameters: 1–13 mm. Match the shank diameter to the chuck capacity. | Standard helical flutes with a split or conventional point. | High-speed steel construction, point angle, flute length, and maximum recommended speed. | Choose a diameter suited to the hole and use a metal-rated bit when drilling steel or aluminum. |
| 2 | Masonry Bits | Drilling in concrete, brick, block, and stone. | Typical diameters: 3–20 mm. Select a shank compatible with the drill chuck or hammer system. | Carbide-tipped cutting head with a reinforced spiral flute. | Carbide tip quality, flute clearance, impact rating, and recommended drilling diameter. | Use rotary mode for softer masonry and hammer mode only when the bit and drill are impact-rated. |
| 3 | Brad-Point Bits | Clean, accurately positioned holes in wood and wood-based panels. | Common diameters: 3–25 mm. Shank sizes must fit the drill chuck. | Center spur and outer cutting spurs help reduce wandering and tear-out. | Tip sharpness, spur geometry, flute depth, and maximum drilling speed. | Select a brad-point profile when hole location and clean entry and exit edges matter. |
| 4 | Spade Bits | Fast, rough drilling of larger holes in timber and softwood. | Typical diameters: 6–38 mm. Confirm that the drill has enough torque for larger sizes. | Flat paddle shape with a center point and sharpened side wings. | Blade thickness, center-point design, cutting-edge sharpness, and recommended speed range. | Use for speed rather than a fine finish; reduce pressure near the breakthrough point to limit splintering. |
| 5 | Hole Saws | Large circular openings in wood, plastic, drywall, and thin metal. | Common cutting diameters: 19–152 mm. Arbor and pilot-bit compatibility are essential. | Cylindrical toothed cup with a central pilot drill. | Tooth material, cutting depth, arbor runout, ventilation slots, and material-specific speed. | Choose a cutting depth greater than the workpiece thickness and use a pilot bit for stable starting. |
| 6 | Countersink Bits | Creating a tapered recess for flush screw heads. | Common angles include 82°, 90°, and 100°. Match the angle to the fastener head. | Conical cutting head, sometimes combined with an integrated pilot drill. | Included angle, cutting-edge count, adjustable depth feature, and material compatibility. | Use the countersink angle that matches the screw head to avoid partial seating or surface damage. |
| 7 | Step Drill Bits | Progressively enlarging holes in thin sheet metal, plastic, and electrical enclosures. | One bit may cover several diameters, often approximately 4–32 mm. | Conical stepped profile with multiple cutting shoulders. | Step diameter markings, coating, maximum material thickness, and speed range. | Check the required final diameter and ensure each step is deep enough for the material thickness. |
| 8 | Screwdriver Bits | Driving slotted, Phillips, Pozidriv, hex, and other screw profiles. | Usually 25 or 50 mm insert lengths; select the correct bit size and holder interface. | Precision-milled tip matched to the screw recess geometry. | Tip fit, torsion resistance, impact rating, hardness, and bit length. | A precise fit reduces cam-out and fastener damage; use impact-rated bits in impact drivers. |
| 9 | Drill Chucks and Adaptors | Connecting accessories to drills with different drive interfaces. | Typical chuck capacities include 1–10 mm and 1.5–13 mm; verify spindle or hex compatibility. | Keyed or keyless chuck, or a quick-change hex adaptor. | Capacity range, concentricity, clamping force, maximum rotational speed, and impact suitability. | Choose a chuck whose capacity covers the accessory shank without exceeding the drill's rated speed. |
| 10 | Sanding and Polishing Attachments | Surface preparation, smoothing, deburring, and light polishing. | Common backing-pad diameters: 50–125 mm. Match the attachment to the drill's speed control. | Disc, flap, brush, or polishing-pad form with a compatible shank. | Grit or abrasive grade, maximum RPM, pad diameter, balance, and material suitability. | Stay below the attachment's maximum RPM and use finer grits for finishing rather than material removal. |
Checking Accessory Quality, Durability, and Safety Features
10 Tips for Choosing the Best Drill Accessories
Quality starts with the material. Check whether bits, blades, and attachments feel solid, evenly finished, and free from cracks. Look for clean edges and precise shanks. A poorly machined shank can wobble inside the chuck. That wastes power and damages surfaces. Compare the accessory with your project material. Wood, metal, masonry, and plastic require different cutting designs. Harder coatings may improve wear resistance, but coating alone does not prove quality. Ask for clear specifications, including size tolerance, compatible drill type, and recommended speed.
Durability becomes visible during use. Choose accessories with reinforced connection points and heat-resistant construction. Test a bit slowly before applying pressure. Excessive vibration, smoke, or unusual noise signals trouble. Stop immediately. A comfortable grip also matters when using extension shafts or hole saws. It reduces hand fatigue and improves control. I once trusted a cheap attachment because its packaging looked convincing. It dulled quickly and left rough edges. That mistake reminded me to judge performance, not appearance. Still, even premium accessories can fail when used at the wrong speed.
Safety features deserve equal attention. Check for secure locking systems, stable guards, and non-slip surfaces where applicable. Use accessories with visible wear limits or inspection guidance. Confirm that the shank fits the chuck completely. Loose fittings can eject under load. Wear suitable eye protection, hearing protection, and gloves when the task requires them. Keep the workpiece clamped. Never hold small materials by hand near a rotating tool. Read the instructions each time when the accessory is unfamiliar. They are easy to ignore. That can be the costly part.
Comparing Sets, Costs, Storage Options, and Maintenance Needs
Choosing drill accessories is less about collecting the largest set and more about matching tools to real tasks. A compact set may include common bits for wood, metal, and masonry. However, a larger set often adds sizes you rarely use. I learned this after buying a broad kit that occupied half a drawer. Several pieces remained untouched for years.
Compare the cost per useful accessory, not only the package price. A low-cost set may contain soft metal bits that become blunt after a few holes. Replacing them repeatedly can exceed the price of a smaller, stronger set. For occasional repairs, a basic collection is usually practical. For regular installation work, specialized bits can save time and reduce damaged screws. Check the bit coating, size markings, and compatibility with your drill before paying. I once ignored the shank size. That mistake caused wobbling.
Storage affects performance more than many buyers expect. A case with labeled slots helps prevent missing sizes and protects sharp edges. A small wall box works well in a busy workshop. Keep accessories dry, especially after drilling masonry or outdoor materials. Wipe away dust before returning each bit. Maintenance is simple: inspect tips, remove debris, and lightly protect suitable metal surfaces from moisture. Do not force a dull bit. I still sometimes delay replacing one, which wastes time and produces rough holes. A written inventory can reveal which accessories deserve replacement and which were unnecessary purchases.
10 Tips for Choosing the Best Drill Accessories
Comparing typical set costs, accessory counts, storage options, and maintenance needs
Typical consumer-grade price estimates show that mixed accessory kits offer the widest range of tools, while hole saw sets usually cost more because of their larger cutting components. Choose a set with clearly labeled storage, corrosion-resistant materials, compatible shank sizes, and replacement parts. Clean accessories after use, dry them completely, and lightly oil carbon-steel components to extend service life.
Skip to content
